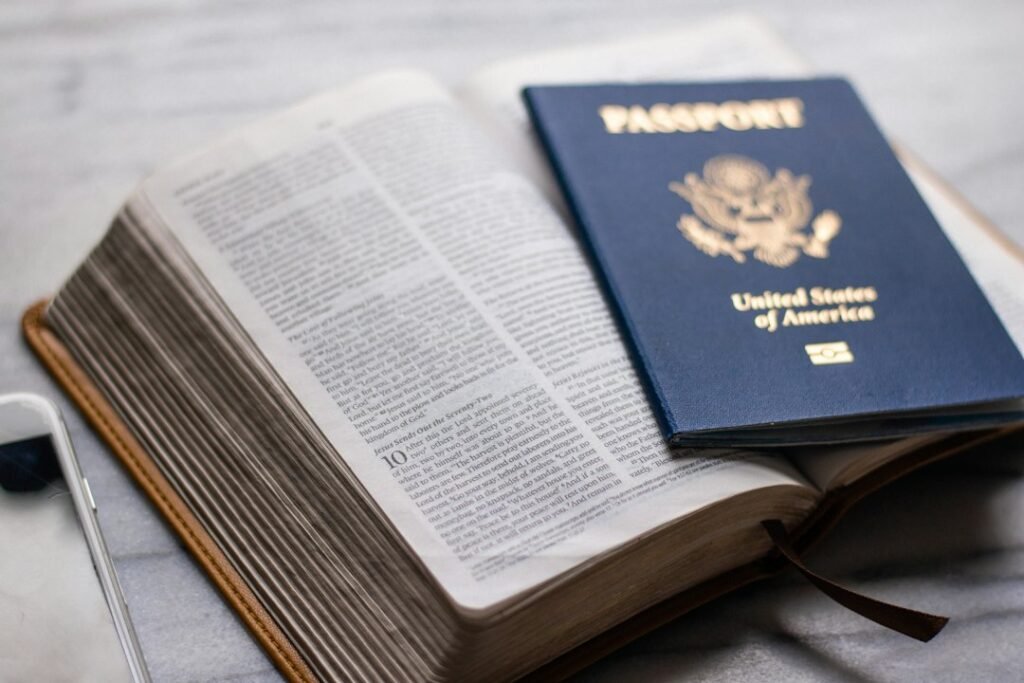
Renewing your Indian passport is an essential task for anyone looking to travel, study abroad, or even apply for certain jobs. While it might seem like a straightforward administrative process, smart financial planning can turn it into an opportunity to save money and manage your personal finances more effectively.
This detailed guide will walk you through the cheapest and most efficient ways to renew your passport in India, all while integrating valuable personal finance principles. We’ll help you avoid unnecessary expenses, manage documents like a pro, and ensure a smooth process without any financial surprises.
- Plan well in advance to avoid expensive Tatkal services.
- Choose the 10-year validity for adults to save on future fees.
- Meticulously prepare documents online and offline to prevent delays and costs.
- Always pay official fees online via the Passport Seva website, avoiding agents.
Tip 1: Plan Far in Advance to Save Significantly on Tatkal Fees
One of the biggest financial blunders many people make when renewing their passport is waiting until the last minute. This often forces them to opt for the Tatkal (expedited) service, which comes with a hefty premium. While the Tatkal service is designed for urgent travel needs, relying on it due to poor planning is a direct hit to your wallet.
The standard fee for a fresh passport or renewal of a 36-page booklet with 10-year validity is INR 1,500. For a 60-page booklet, it’s INR 2,000. However, if you opt for the Tatkal service, these fees jump significantly. A 36-page Tatkal passport costs INR 3,500 (INR 1,500 + INR 2,000 Tatkal fee), and a 60-page Tatkal passport costs INR 4,000 (INR 2,000 + INR 2,000 Tatkal fee). That’s an extra INR 2,000 that could have been saved!
How to apply it: Start the renewal process at least 9-12 months before your current passport expires, or before any planned international travel. This gives you ample buffer time for the standard application processing, which typically takes 3-4 weeks but can sometimes extend due to police verification or unforeseen circumstances. By doing so, you automatically qualify for the cheaper ‘Normal’ application category, saving you a substantial amount of money right off the bat.
Tip 2: Choose the Optimal Passport Validity Period for Long-Term Savings
When renewing your passport, you generally have options for the validity period, especially for minors, and the number of pages. Making an informed decision here can lead to long-term financial savings and fewer administrative headaches. For adults, the standard validity is 10 years, which is almost always the most cost-effective choice in the long run.
Consider the fees: a 10-year validity 36-page passport costs INR 1,500. If a 5-year option were available for adults (it’s primarily for minors), renewing it twice over a decade would cost you INR 3,000 (assuming the same fee), plus the hassle of two separate application processes. For minors (below 18 years), passports are issued with a 5-year validity or until they turn 18, whichever is earlier. For a minor who is, say, 15 years old, a 5-year validity passport would take them to 20 years old. However, if they are younger, say 5 years old, they would need a renewal when they turn 10 and again when they turn 15, incurring multiple fees.
How to apply it: For adults, always opt for the 10-year validity passport. It’s a one-time investment that saves you the cost and effort of renewing more frequently. For minors, weigh the options. If your child is very young and their appearance might change significantly, or if you anticipate less international travel, the standard validity until they are 18 (or 5 years) is appropriate. However, understand that you will need to renew it again as an adult, which is a normal process. The key is to avoid unnecessary renewals. For instance, if a minor is close to 15 years old, getting a 5-year passport means they’ll need another renewal shortly after turning 18. This is unavoidable, but planning for it means you won’t be surprised by the next expense.
Tip 3: Master the Online Application Process to Avoid Errors and Rejections
The first step in renewing your Indian passport is completing the online application form on the official Passport Seva website. This step is critical not just for convenience, but also for financial prudence. Any errors or incomplete information in your online application can lead to delays, rejection of your application at the Passport Seva Kendra (PSK), and potentially force you to re-apply, incurring additional costs like re-printing documents or even re-paying fees if you miss a deadline or have to restart the entire process.
The Passport Seva website (passportindia.gov.in) is user-friendly, but requires attention to detail. Filling out the form correctly the first time saves you immense time, stress, and potential financial implications. It also prevents you from needing to consult or pay unofficial agents who might charge exorbitant fees for a task you can easily do yourself for free.
How to apply it:
- Register and Log In: Visit passportindia.gov.in and register as a new user if you haven’t already. Log in to your account.
- Select Application Type: Choose “Apply for Fresh Passport/Re-issue of Passport.” Select “Re-issue of Passport” and indicate the reason (e.g., “Validity Expired/About to Expire”).
- Fill Accurately: Carefully fill in all personal details, previous passport details, family information, and address. Cross-check every field for spelling mistakes, correct dates, and matching information as per your existing documents.
- Review Before Submission: Before final submission, use the “Preview Application Form” option. Read through every detail as if you were an official checking it. Ensure consistency with your Aadhaar, PAN, and previous passport.
- Save Regularly: The portal allows you to save your application as a draft. Do this frequently to avoid losing progress due to internet issues or timeouts.
Tip 4: Assemble Your Documents Flawlessly to Avoid Delays and Extra Costs
Document preparation is perhaps the most critical step in avoiding delays, rejections, and associated costs during passport renewal. An incomplete set of documents, or documents with discrepancies, can lead to your application being put on hold, requiring multiple visits to the PSK, or even rejection. Each extra visit means travel costs (fuel, public transport), time off work (loss of income), and potential re-printing costs.
For passport renewal, the requirements are generally simpler than for a fresh passport, but meticulousness is still key. The primary documents usually required are your original old passport, proof of address, and proof of date of birth. However, depending on the change (e.g., name change, address change), additional documents may be needed. Always refer to the official Passport Seva website for the most current and specific list of required documents for your particular category.
How to apply it:
- Check Official Website: Before gathering anything, visit the “Document Advisor” section on passportindia.gov.in. Select your scenario (e.g., Re-issue, Normal scheme, Age > 18) to get a precise list of documents required.
- Gather Originals and Photocopies: For every document listed (e.g., old passport, Aadhaar card, utility bill for address proof), ensure you have the original and at least two self-attested photocopies. The originals are for verification, and the copies are for submission.
- Verify Address Proof: Ensure your address proof (e.g., Aadhaar, electricity bill, bank passbook) matches the address you provided in your online application. Discrepancies here are a common reason for delays. If you’ve recently moved, ensure your new address is updated on your Aadhaar or have an alternative valid address proof.
- Photographs: Ensure you have two recent passport-size photographs (4.5 cm x 3.5 cm) with a white background, without spectacles, and with a neutral expression. These are generally required for the application form, though some PSKs now capture photos digitally. It’s always safer to carry physical copies.
- Organize and Carry: On the day of your appointment, arrange your documents neatly in a folder – originals in one section, photocopies in another. This makes the verification process quicker and smoother for both you and the PSK official.
Tip 5: Pay Online Through Official Channels ONLY to Avoid Agent Fees
Once you have completed your online application, the next crucial step is to pay the passport fees and schedule your appointment. This is where many individuals unknowingly fall prey to unofficial agents or touts who promise a quicker or easier process for an extra fee. Engaging these agents is a direct violation of smart money management principles, as you end up paying significantly more for services you can perform yourself for free.
The only legitimate way to pay your passport application fee in India is through the official Passport Seva website. The system is designed to be transparent and user-friendly, offering various online payment options. The official fees are fixed and clearly stated, so any additional charges proposed by third parties are purely their commission.
How to apply it:
- Access Payment Gateway: After filling and submitting your online application, click on “Pay and Schedule Appointment” on the Passport Seva portal.
- Choose Payment Method: You will be directed to the payment gateway where you can choose from various options like Net Banking (SBI and other banks), Credit/Debit Cards (Visa, MasterCard), or SBI Wallet.
- Confirm Fee: Double-check that the amount displayed matches the official fee for your chosen service (e.g., INR 1,500 for normal 10-year validity).
- Complete Transaction: Follow the on-screen instructions to complete your payment securely. Once successful, you will receive a payment confirmation and be able to proceed to schedule your appointment.
- Print Application Receipt: After successful payment and appointment booking, print the Application Receipt, which contains your Application Reference Number (ARN) and appointment details. This is mandatory to carry to the PSK.
Tip 6: Be Prepared for Your PSK Appointment to Ensure a Smooth Visit
Your appointment at the Passport Seva Kendra (PSK) is the physical verification stage of your passport renewal. Being thoroughly prepared for this visit is not just about efficiency; it’s also about preventing delays that could lead to rescheduled appointments, additional travel costs, and wasted time. A smooth PSK experience is a hallmark of good planning and saves you from potential financial drain.
The PSK process involves document verification, photo and biometric capture, and final review by a Passport Officer. Any discrepancies or missing documents at this stage can halt your application, requiring you to revisit, sometimes after making corrections or arranging missing documents. This can be particularly frustrating if the PSK is far from your home or if you have to take time off from work repeatedly.
How to apply it:
- Arrive Early: Aim to reach the PSK at least 15-20 minutes before your scheduled appointment time. This gives you buffer time for parking, security checks, and finding your way around.
- Carry All Documents: Bring all original documents and their self-attested photocopies (as per Tip 4). Do not forget your old passport, even if it’s expired. Also, carry your printed application receipt with the ARN.
- Dress Appropriately: While not a strict rule, dressing in smart casuals is generally advisable. Avoid white clothes as they can blend with the photo background, and heavy makeup or accessories that might obscure your face for biometric capture.
- Stay Calm and Courteous: The PSK staff handle hundreds of applications daily. Being polite and cooperative can help in a smoother process. If there’s an issue, calmly ask for clarification and follow their instructions.
- Avoid Touts: You might encounter individuals outside PSKs offering “help” or “faster processing.” Steer clear of them. They are unofficial and often charge exorbitant fees for services you don’t need or can do yourself. Your pre-booked appointment guarantees your turn inside.
Tip 7: Understand and Facilitate Police Verification for Timely Issuance
Police Verification (PV) is an integral part of the passport issuance process, especially for fresh passports and sometimes for re-issue applications, particularly if there’s an address change or other significant updates. While it’s an administrative step, understanding it from a financial perspective means ensuring it happens smoothly and efficiently to avoid delays that could impact travel plans or incur additional costs due to rebooking flights or accommodation.
A delayed or negative police verification report can significantly hold up your passport issuance. In some cases, it might even require you to visit the local police station, consuming your time and potentially leading to unofficial requests for “facilitation fees” – which you should firmly refuse. Being prepared and cooperative during the PV process ensures it concludes quickly and positively.
How to apply it:
- Know Your Jurisdiction: Be aware of the police station under whose jurisdiction your current address falls. This is where the verification officer will typically come from.
- Keep Documents Ready: When the police officer visits, have your original address proof (the same one submitted with your application), identity proof, and a copy of your application receipt ready. Some officers might also ask for a copy of your Aadhaar card and PAN card.
- Be Present: Ensure someone responsible (preferably yourself) is available at the given address when the police officer visits. If you are frequently out, inform family members or neighbours to alert you.
- Cooperate Fully: Answer all questions truthfully and provide any requested documents promptly. The goal is to establish your identity and verify your address.
- Report Unofficial Demands: If any police officer demands unofficial payments, politely refuse. You can escalate such issues to higher authorities within the police department or the Passport Seva customer care if necessary. Official PV is a free service.
- Track Status: You can track the status of your police verification on the Passport Seva website using your ARN. This helps you anticipate potential delays and follow up if needed.
Tip 8: Regularly Check Passport Expiry Dates to Prevent Last-Minute Panic
This tip circles back to the very first one but emphasizes a crucial personal finance habit: proactive monitoring. Just as you regularly check your bank balance, investment portfolio, or insurance policy expiry dates, making a habit of checking your passport’s expiry date is a simple yet powerful money management strategy. It’s about preventing a small administrative task from turning into an expensive emergency due to oversight.
Many international travel destinations require your passport to be valid for at least six months beyond your intended date of departure. Failing to meet this requirement can lead to denied boarding, cancelled trips, and significant financial losses on non-refundable flights, hotels, and tour packages. A last-minute rush almost always means opting for the Tatkal service, which, as we discussed, adds INR 2,000 to your renewal cost.
How to apply it:
- Annual Check-up: Make it a habit to check your passport’s expiry date at least once a year, perhaps around your birthday or at the start of the financial year. This simple ritual takes less than a minute.
- Digital Reminders: Use digital tools. Set a recurring annual reminder on your phone’s calendar or a reminder app. Set the first reminder for 12 months before expiry, and a follow-up for 9 months before expiry.
- Family Passports: If you manage passports for your family (spouse, children), maintain a central record of all expiry dates. This helps in planning renewals together or sequentially, streamlining the process.
- Travel Planning Rule: Before booking any international travel, always verify that your passport will be valid for at least six months beyond your return date. This is non-negotiable for smooth travel and avoids potential financial losses from trip cancellations.
Bonus Tip: Leverage Digital India Initiatives for Document Management
In today’s digital age, India has made significant strides in digitizing government services and documents. Platforms like DigiLocker (digilocker.gov.in) offer a secure cloud-based platform for the issuance and verification of documents and certificates. While you still need to carry physical documents for your PSK appointment, using DigiLocker can indirectly contribute to smarter money management and efficiency.
How does this save money? By having digital copies of your essential documents (Aadhaar, PAN, driving license, educational certificates) securely stored and accessible, you reduce the reliance on physical copies. This means fewer instances of needing to rush to a print shop, saving small but recurring costs. More importantly, it ensures you always have access to your documents, even if physical copies are misplaced, preventing delays in processes like passport renewal that might require those documents.
How to apply it:
- Register for DigiLocker: If you haven’t already, sign up for a DigiLocker account using your Aadhaar number.
- Fetch Documents: Link your Aadhaar, PAN, and other relevant documents like your driving license or even your old passport details to fetch their digital versions into your DigiLocker account.
- Access Anytime: You can access these documents anytime, anywhere, using your smartphone. This can be particularly helpful if you are asked for a document unexpectedly and don’t have the physical copy readily available (though for PSK, physical originals are still a must).
- Future-Proofing: As India moves towards more digital verification, having your documents on DigiLocker will streamline future government interactions and reduce the need for physical paperwork. This is a forward-thinking financial habit – embracing technology to save time and resources.
- Proactive planning is the cornerstone of a cheap and hassle-free passport renewal, saving you INR 2,000 in Tatkal fees.
- Always use the official Passport Seva website for application and payment, avoiding third-party agents and their commissions.
- Meticulous document preparation and attention to detail in the online form prevent rejections, delays, and re-application costs.
- Regularly checking your passport’s expiry date is a fundamental personal finance habit that prevents last-minute expensive emergencies.
- Embrace digital tools like DigiLocker for efficient document management, indirectly saving time and minor costs in the long run.
Renewing your Indian passport doesn’t have to be a stressful or expensive affair. By adopting these smart money management tips and approaching the process with a bit of planning and attention to detail, you can ensure a smooth, cost-effective, and timely renewal. Think of it as another opportunity to practice your financial wisdom – every rupee saved is a rupee earned, and every efficient process is time saved, which is also money saved. So, go ahead, plan your passport renewal wisely, and embark on your next adventure with peace of mind, knowing you’ve managed your money smartly.
Ready to apply these principles to other areas of your finances? Explore how smart planning can boost your savings and manage expenses effectively. Check out our NexifyLabs Budget Calculator to get started on your journey towards comprehensive financial well-being!
Content is intended for informational and educational purposes only, not financial advice. Rates, prices and product details may change — please verify on official sources before making any financial decisions.
© 2026 NexifyLabs Money — All rights reserved.